Leaving Next.js behind
Working wxith Next.js at my previous workplace and using it almost exclusively for generating static websites, I didn't think twice before using it for my personal website.
And it was great: with Vercel on the free plan, I didn't have to think about anything. A simple git push and my website was up to date a minute later. With the low traffic I'm experiencing on my website, it doesn't costed me a dime!
So why part away?
Working with Next.js on a website as simple as mine always felt like using war machine where a way, way, more basic tool could be used. On top of that, I was never fully at ease when using Vercel as a hosting solution. I was feeling like my website should be hosted at home, with a local hosting provider.
I'm not going to speak about other controversies like this one on a vendor lock-in background but I can at least say that I'm more comfortable with a fully independent open-source solution.
I also wanted to make simpler things and rely less on JavaScript for everything.
An ode to simplicity #
Instead of relying on a big meta framework like Next.js coupled with Vercel' infrastructure, my website is now built with Hono and self hosted on a tiny VPS provided by OVH, a French hosting provider.
This new website, with a design heavily inspired by zed.dev, is statically generated locally on my machine then deployed on my VPS with a basic rsync command.
HTML is generated by JSX components - Hono provides support out of the box - and styled by CSS leveraging the new layer system allowing full control over specificity in a context of a global stylesheet.
Hono's JSX let me reuse a lot of my Next.js assets as it supports async components.
Escaping the bundling hell #
Sure, I still use a package.json and rely on some external dependencies while I develop and build my website:
{
  "devDependencies": {
    "@types/bun": "latest",
    "@types/uglify-js": "^3.17.5",
    "classnames": "^2.5.1",
    "front-matter": "^4.0.2",
    "hono": "^4.8.5",
    "lightningcss": "^1.30.1",
    "marked": "^16.1.1",
    "serve": "^14.2.4",
    "sharp": "^0.34.3",
    "shiki": "^3.8.1",
    "uglify-js": "^3.19.3",
    "zx": "^8.7.1"
  }
}
But in the end, I only have .html and .css files.
Trying to work without JavaScript #
React.js was really great for building absolutely anything but it was also pushing me to use JavaScript everywhere, even when it wasn't needed. The goal, with this new website, was to use JavasScript only as a last resort. As I wanted my website to still be fully functional without JavaScript enabled.
In order to eliminate almost all JavaScript usage, I had to rethink most of the interactive parts of my website and leave some functionality behind.
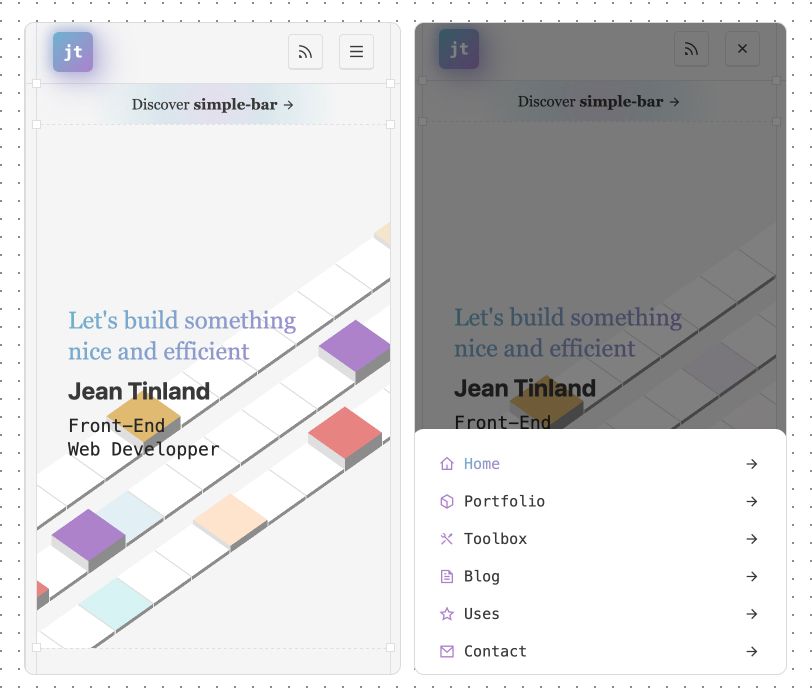
I made a lot of things work with pure CSS:
A responsive navigation #

A basic image gallery with zoom #
24/07/2025 edit: The process of creating this image gallery is now detailed in this article.
Using JavaScript on non-critical parts #
Even if wanted a website working with HTML and CSS only, there were some things impossible to create without JavaScript.
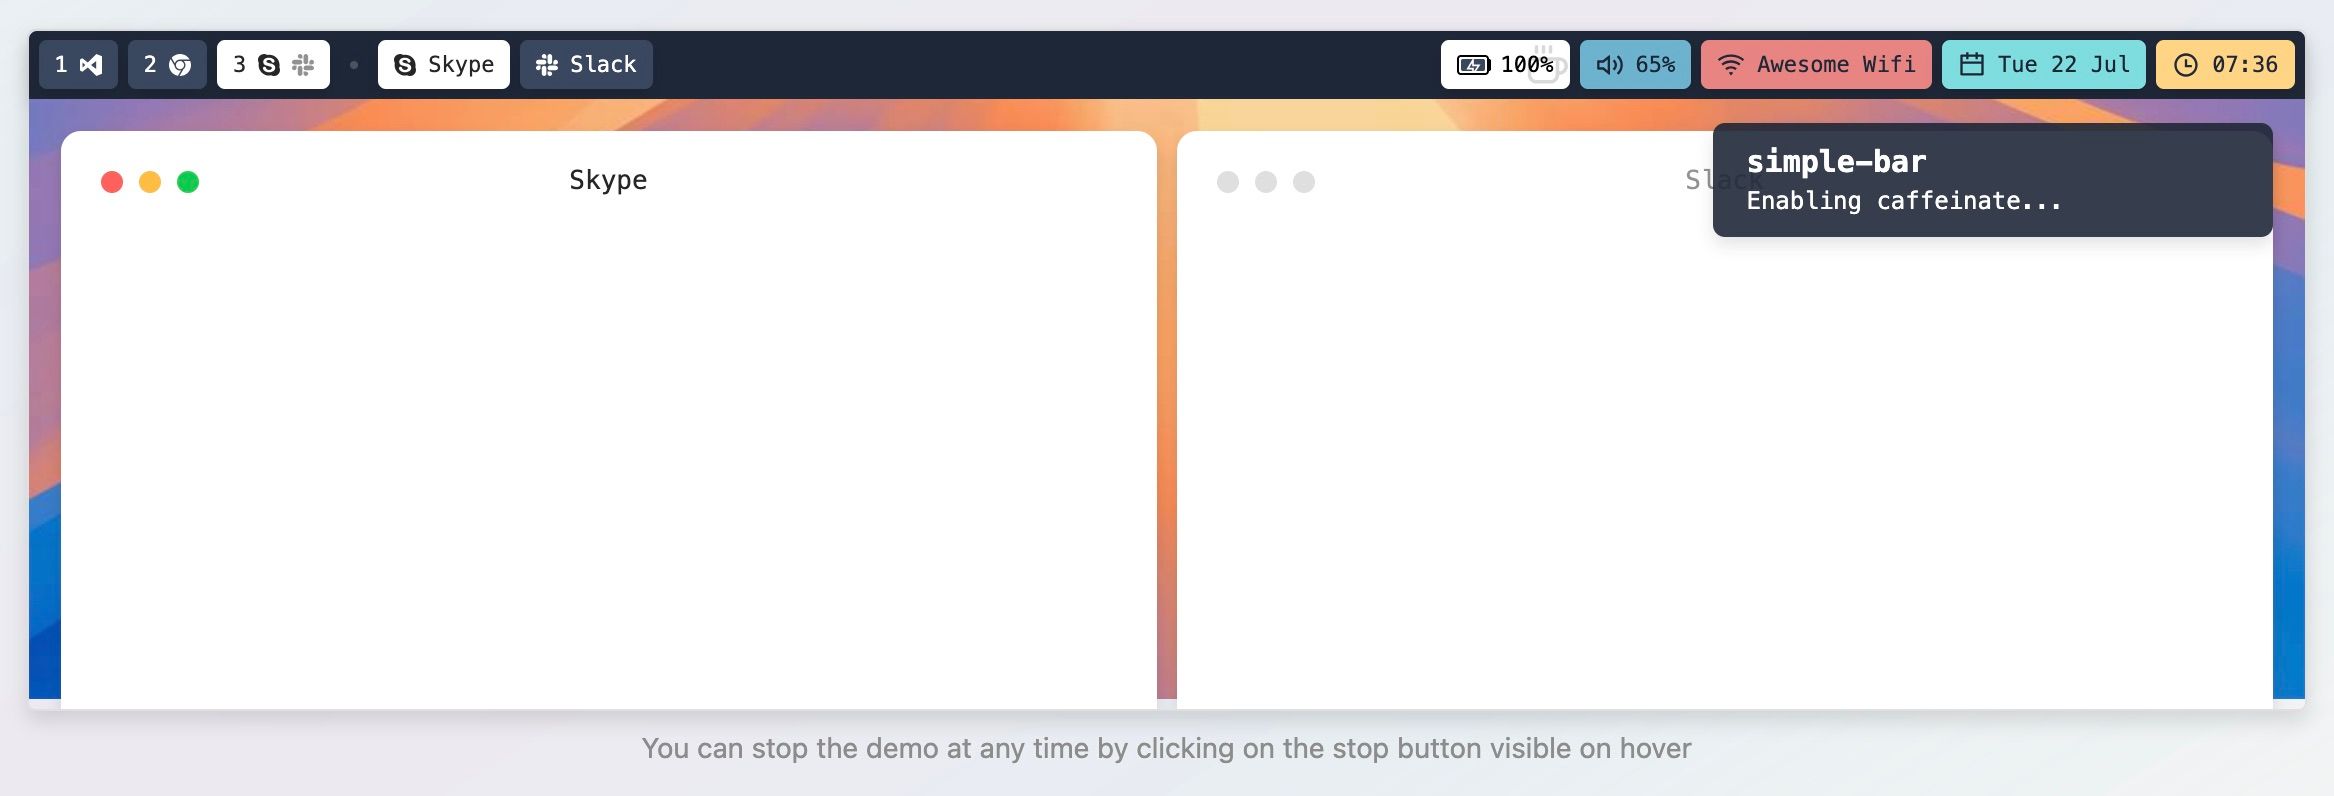
The perfect example is this interactive demo for simple-bar which obviously cannot exists without JavaScript.

Using web components and in this case a shadow root makes this demo fully autonomous and isolated from the rest of the website.
A noscript tag allows to render an image instead of the demo if JavaScript is disabled:
<simple-bar-demo playing="true">
  <noscript>
    <image
      className="introduction__image"
      src="/public/images/toolbox/simple-bar/preview.jpg"
      alt="Simple Bar Demo"
    />
  </noscript>
</simple-bar-demo>
I also re-implemented my lazy loaded icon component using a web component. Its source can be found here, on my GitHub.
Using a noscript fallback made it "JavaScript less" compatible:
export default function Icon({ code, className }: Props) {
  const href = `/public/images/icons/${code}.svg#icon`;

  return (
    <lazy-icon code={code} class={className}>
      <noscript>
        <svg
          xmlns="http://www.w3.org/2000/svg"
          viewBox="0 0 24 24"
          class={className}
        >
          <use href={href} />
        </svg>
      </noscript>
    </lazy-icon>
  );
}
A handmade Image component #
The Image component provided by Next.js was really easy to use as a simple drop-in replacement for <img /> tags. As I was moving from an hybrid static website running with a Node.js server to a fully static website, I had to find another way to optimize my images.
I settled on creating a custom <Image /> component that would handle image optimization and resizing during build time. Generating all my website images at once takes around 2 minutes but I only have to do it once globally, otherwise, images are generated during dev time.
This <Image /> component is async and uses sharp in order to transform the requested image in 3 output files:
- An optimized version in the same format
- A
.webpversion - An
.avifversion
These 3 files are used inside a <picture> tag:
<!-- Input -->
<image
  className="about__description-picture"
  src="/public/images/about/picture.png"
  width="{60}"
  height="{60}"
  loading="lazy"
  alt="Jean Tinland"
/>

<!-- Output -->
<picture class="about__description-picture">
  <source
    srcset="/_generated/w60h60/images/about/picture.avif"
    type="image/avif"
  />
  <source
    srcset="/_generated/w60h60/images/about/picture.webp"
    type="image/webp"
  />
  <img
    src="/_generated/w60h60/images/about/picture.png"
    alt="Jean Tinland"
    loading="lazy"
  />
</picture>
That way, the browser loads the first image format compatible.
Enters the speculation rules #
Hosting my website in France outside a CDN made it slower than before for almost all my visitors as very few comes from France.
Reducing all the assets size - mostly with a big refactor and minification - plus enabling HTTP/2 already reduced loading time a lot.
A nice touch was to enable this relatively recent feature pushed by the Chrome team: the Speculation Rules API.
const rules = {
  prerender: [
    {
      where: { and: [{ href_matches: "/*" }] },
      eagerness: "moderate",
    },
  ],
  prefetch: [
    {
      urls: ["/portfolio/", "/toolbox/", "/blog/"],
      referrer_policy: "no-referrer",
    },
  ],
};

export default function SpeculationRules() {
  return (
    <script
      type="speculationrules"
      dangerouslySetInnerHTML={{ __html: JSON.stringify(rules) }}
    />
  );
}
With theses rules every internal link hovered triggers a pre-render of the targeted page allowing for a really fast navigation. Coupled with the View Transition API, everything feels snappy and smooth!
Closing thoughts #
I know this doesn't look like much, but the feeling of creating something more powerful with fewer resources is always bringing a lot of satisfaction.
As time goes by, I think, like everyone else, I try to simplify every aspect of my life I can. Upgrading the dependencies of my personal website every couple of weeks didn't work in any way with this approach.
I already have a good amount of work with my open-source projects; it was not necessary to top that with extra maintenance that wasn't adding any real value to my website.
31/07/2025 edit: This article has been featured in This Week in React #244. Thank you Sébastien Lorber! :)